

 Metabolix Labs Keto ACV Gummies for Trim Tummy")


Thailand says it has asked Myanmar junta to reduce violence
(Reuters) - Thailand has sent messages to Myanmar's junta to reduce violence, its foreign minister said on Friday, adding preparations are underway for an influx...
European court ruling puts cautious Swiss in climate bind
Switzerland for all its snow-capped mountains and crisp Alpine air has failed to protect its people from the ravages of climate change, as a top...
Keto BHB Salts Reviews (NTX KETO BHB GUMMIES) Metabolix Labs Keto ACV Gummies for Trim Tummy
KETO BHB SALTS REVIEWS: KETO BHB GUMMIES + BHB SALTS FOR WEIGHT LOSS At present time, no one denies the fact that they are putting...

Mexico closed its embassy in Quito and withdrew diplomatic personnel from the country
The government of Andrés Manuel López Obrador will go to the International Court of Justice on Monday to denounce Ecuador's responsibility for violating international law....

ProstaBiome Reviews – All You Need to Know About ProstaBiome by a Largo, Florida-based Supplement Company
Understanding ProstaBiome ProstaBiome is a cutting-edge supplement developed by a trusted Largo, Florida-based company. This unique formula is specifically designed to support prostate health and...

Australia supermarkets should face hefty fines for code of conduct breach, says report
Australia's major supermarkets should face hefty fines if they do not comply with an industry code of conduct when dealing with suppliers, a government-commissioned report...
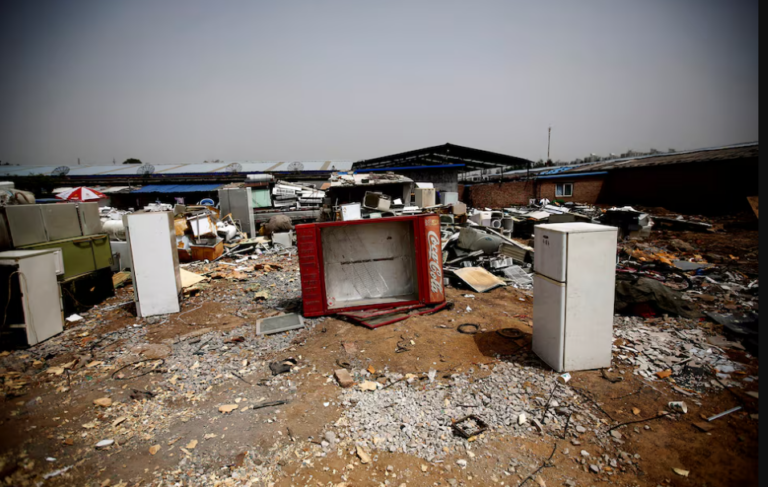
Climate-warming gases being smuggled into Europe, investigation says
Large amounts of climate-warming refrigerant gases from China and Turkey are being smuggled illegally into Europe, undermining a global pact to phase them out, a...

Melbourne Train Accident – Train operators fined over derailment that killed two!
Two train operators have been fined a total of more than $500,000 over a Victorian derailment that killed two men. NSW Trains and the Australian Rail Track...

BJP sends defamation notice to Delhi minister Atishi over ‘offer’ claim
NEW DELHI: Bhartiya Janata Party's (BJP) Delhi unit on Wednesday sent a defamation notice to Delhi minister Atishi and demanded a public apology for her...

NATO ministers mull 100 billion euro military fund for Ukraine
(Reuters) - NATO foreign ministers meet on Wednesday to discuss how to put military support for Ukraine on a long-term footing, including a proposal for a 100...